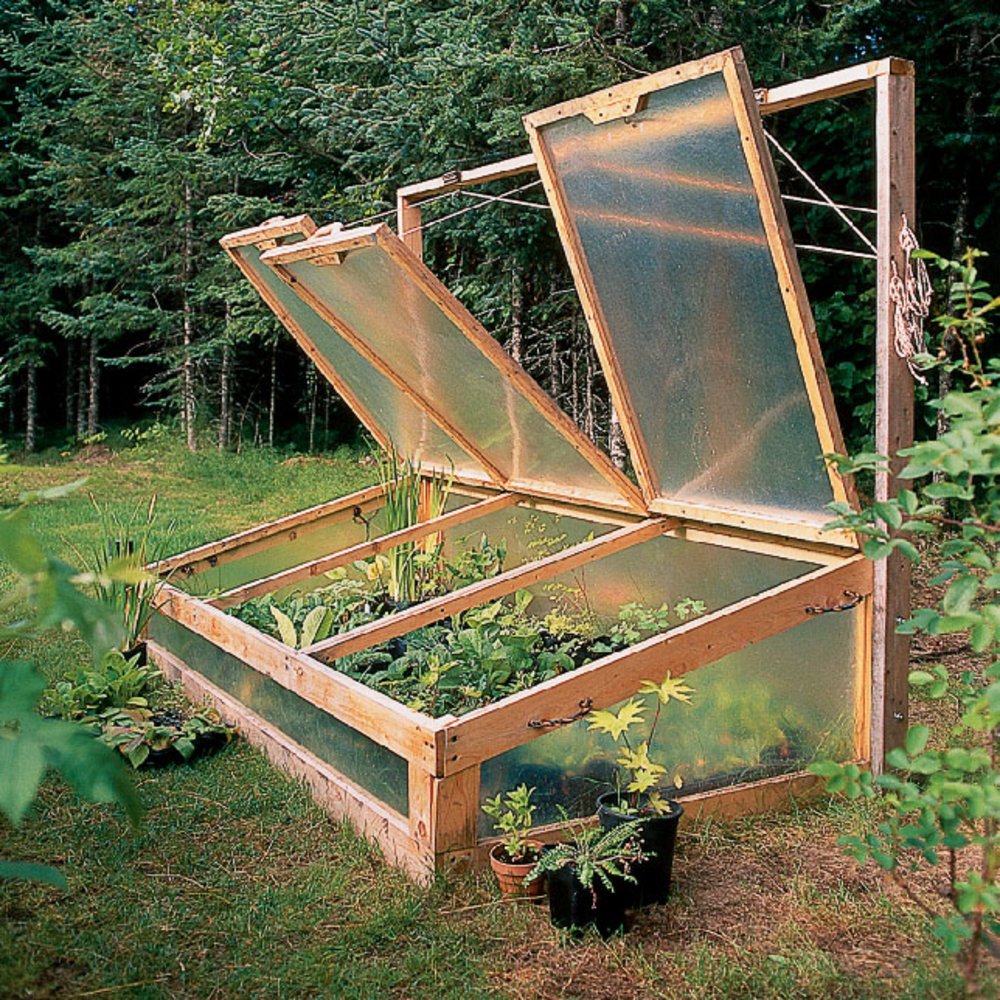
Guide to Cold Frame Building for All Seasons
Cold frames are a gardener's best friend, offering a protected space for seedlings, tender plants, and even overwintering vegetables. By extending the growing season both in spring and fall, cold frames make gardening a more fulfilling experience. Building a cold frame isn’t just about creating a functional structure; it's about adding an aesthetically pleasing element to your garden that complements your existing landscaping. But with so many different designs available, choosing the right one can be overwhelming. This guide will take you through the process of building a cold frame from scratch, ensuring you have a structure that meets your needs and budget.
Choosing the Right Location
The success of your cold frame depends largely on its location. Choose a spot that receives full sun for at least six hours a day, preferably in the morning, as this will help warm the air inside. Make sure the area is well-drained, preventing waterlogging and root rot. Avoid placing your cold frame near trees or large buildings that could cast shade throughout the day. Consider the direction of prevailing winds and build a cold frame that is sheltered from strong gusts.
Materials You'll Need
There are many materials you can use to construct a cold frame, each with its advantages and disadvantages. Here are some popular choices:
Framing
The frame provides the structure for your cold frame. Here are some common options:
- Wood: Inexpensive and readily available, wood is a popular choice. Choose treated lumber for durability and resistance to rot.
- Metal: Aluminum or galvanized steel offer durability and longevity, especially in harsher climates.
- PVC Pipe: Lightweight and easy to work with, PVC pipe provides a strong and affordable option for cold frame construction.
Covering
The covering material plays a vital role in regulating the temperature inside your cold frame. Choose a material that allows light to penetrate while providing insulation:
- Glass: Traditional and effective, glass offers excellent light transmission and insulation. However, it can be heavy and prone to breakage.
- Plexiglass: Lighter and more durable than glass, plexiglass provides good light transmission and insulation. It is also available in different thicknesses to suit different needs.
- Polycarbonate: A modern alternative to glass and plexiglass, polycarbonate is lightweight, strong, and offers excellent insulation. It is also available in various colors and textures.
- Greenhouse Plastic Film: Budget-friendly and lightweight, greenhouse plastic film provides good light transmission and insulation. It is available in different thicknesses, with thicker films offering better insulation.
Building Your Cold Frame
Once you've chosen your materials, it's time to build your cold frame. Here's a step-by-step guide:
- Measure and cut the materials according to your chosen design. Use a level to ensure all corners are square and the frame is level.
- Assemble the frame using screws or nails. If using wood, predrill holes to prevent splitting. Apply wood glue for added strength.
- Construct the lid, following the same steps as the base. Attach hinges to the lid for easy opening and closing.
- Add a vent to the lid to control temperature and humidity. You can use a piece of wood or metal with a vent hole or a commercially available vent kit.
- Attach the covering to the frame. For glass or plexiglass, use silicone sealant to create a weatherproof seal. For polycarbonate, use screws or bolts with washers.
- Place your cold frame in its chosen location and add a layer of soil.
Tips for Using Your Cold Frame
Now that your cold frame is built, here are some tips for getting the most out of it:
- Monitor the temperature inside the cold frame regularly, especially during cold snaps or hot days. You can use a thermometer to track the temperature.
- Adjust the vent to regulate the temperature and humidity. Open it during warm days and close it at night or during cold spells.
- Water your plants as needed, being careful not to overwater. The soil inside the cold frame should be consistently moist but not soggy.
- Thin seedlings as needed to prevent overcrowding.
- Protect your plants from pests and diseases by regularly inspecting them and removing any affected leaves or stems.
- Clean your cold frame at the end of the season to prevent disease and pests from overwintering.
Building a cold frame is a rewarding project that can significantly enhance your gardening experience. With careful planning and construction, you can enjoy fresh vegetables and flowers for longer, even during the colder months.
0 comments:
Post a Comment
Note: Only a member of this blog may post a comment.